Saturday, August 30, 2008

Install Top Left Wing Skins August 29, 2008


Clecoed and riveted top wiing skins onto left wing. The stiffening flange on the leading edge slipped into place with little persuasion. Greatest challenge was getting holes to line up to accept rivet. Plans very well written and most things are clear.

Moved onto the wing walk doubler. I was expecting difficulty with this as posted on Jerry's and Jim's blog, but following the plans and starting forward lower edge and working up and aft made things go pretty smoothly without the use of straps, etc. Some challenge in getting the holes to accept rivets after all clecoes in place, but used awl and eventually found it necessary to drill a few holes. Many time the hole looked to line up perfectly, but still would not let a rivet slip in. I did not want to force rivets so as not to deform the underlying rib. All went well and makes me worried that it was too easy!

Tomorrow I'll move on to installation of the access hatch and hand hold, etc.

Leading Edge Skins (Left Wing) August 28, 2008

Completed riveting leading edge skins on L wing. Unsure whether to rivet bottom rivet holes but could not find another place in plans that called for this and so moved ahead and riveted these too. installing hinge ribs on page 17-03. Used the close-in hand rivet tool from Avery. Worked well. Next move to installation of upper wing skins. Stripped vinyl from W1201BL and clecoed into place on inboard section of wing. Done for the night!

Tuesday, August 26, 2008

Riveting the L Leading Edge

Brian came over to help me flip the left wing. Wendy pitched in to protect the leading edge the flip went without incident. Then Brian and I clecoed the skins (W1201, 1202 & 1203 into place. It was good to have an extra set of hands to help line up the holes. Thanks Brian! We also used an awl to help with this. After skins clecoed in place, we checked the stall warning vane to be sure that it still had the right play and found it not to engage. So, I reached into the wing from the rear, loosened the 2 screws and we readjusted to get it right (again!). Hopefully this will be last adjustment necessary on the stall warning switch installation.

Monday, August 25, 2008

Left Wing Bottom Skin Install, August 24, 2008

Back at it at 11:30 a.m. Started with step #3 on p. 17-02, calling for 3/8 drill out for the tie down ring. This worked but the result was not as good as I would have liked. The drill made a hole not perfectly circular. Took round file and filed edges.


Next, clecoed and riveted outboard skin to skeleton. Paid particular attention to the "leave open" directions (don't want any re-do's if I can help it). Deburred edges before clecoeing. Clecoed and riveted with no problems.


Finally, step #5, clecoe the W-1202L skin to the middle. Again, double and triple check instructions to avoid mistakes. All went well and completed task at 2:30.

58.5 hours into the project as of today (does not count study time!)

Wiring & Installing Terminal Brackets, Begin Skins, August 23, 2008

After futzing around with the stall warning switch installation for more time than necessary, I moved on to the wiring and installing the terminal brackets. (Important note: the plans call for building the L & R wings at the same time. I cannot do this because my aim is to build the RV12 in a one car garage and don't have room for wings to be built simultaneously.)


While following the directions and attaching the terminal and ground wires to the W1205L using the screws and nuts called for, I discovered that the inventory indicated that 2 MS21042-08 nuts were provided (and they were) but the plans require 3. Two for the W1205L and 1 for the W1205R. I will order another from Van's tomorrow.


Since I'm only working on one wing at a time, I could move on to the WING SKINS, section 17-02! Brian was with me and we flipped the wing skeleton so that it was upside down on the table. So far, no surprises in lining up the holes and riveting. Some holes looked like the lined up perfectly but the rivet would not go in, even with gentle persuasion. I attempted to line them up using an awl with some success. Those that would not accept a rivet received a #30 drill visit. All went well and the W1201L inboard skin was installed before calling it a day.

Remove Plastic from Skin before Adjusting Stall Switch, August 22, 2008

I wasn't going to work on the plane tonight, but it occurred to me that when I had tested the stall indicator switch vane movement, I had done so with the plastic on the skin. So, down to the garage I went and removed the vinyl covering, reinstall the skin, check the vane movement and found that without the plastic the switch needed readjustment. Whew! Glad I thought of that.

Each time I have tested this it has resulted in some fine tuning. I will retest during skin installation and before riveting to be sure it is correct.

Stall Warning Switch Installation, August 20, 2008


I visited Van's today during lunch hour to get the correct washers for the stall warning mechanism. Bruce helped me. Van's had not included the #4 washer called for in the plans, but they had included a few extra #4L washers. They were out of the #4 and had not indicated this on the packing slip and so I've been trying to solve the mystery for 4 days now. Bruce's solution was to double up on the #4L because they are 1/2 the thickness of the #4's. He also stated that what mattered was that these washers act as spacers. Nice to know.

The switch finally goes together and seems to be correct. I 1st installed the vane upside down and didn't see the error until after the wing skin was clecoed in place. I felt good to catch this at this stage and not later. I put it together at least 4 times,discovering errors each time. The end result is a stall warning switch that works like the directions call for.

Sunday, August 24, 2008

Left Wing with Right Ribs, August 11, 2008


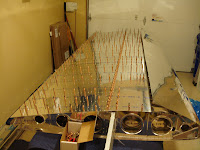
This was to be a great day of riveting and indeed it started out strong. Starting on 15-03, I completed the W1210B-L & R Rib Doublers with no problems and moved on to 15-04 which called for riveting the main ribs to the spar. This went quickly with no difficulties. It was a bit of challenge to rivet the ribs to the spars and hold the head of the rivet gun flush against the rivet.

After attaching all main ribs, match-hole drilling was called for to attach the rear spar assembly to the ribs. With careful reading so as not to drill the wrong holes, this went well too.

Next, on page 15-05, nose ribs attach to the main spar. The first 4 ribs I attached were W1208-L thinking that these would naturally go with the Left spar. Wrong! This was the first serious rivet removal work I had to do. Then, to make matters worse, once I got into the ribs that had an aft flange to attach to the spar, I continued using LP4-3 rivets, making great progress. At some point, after installing 5 more ribs, I realized I should be using LP4-4 rivets! After a choice word or two, I set about drilling these rivets out also and spent the remainder of the time doing this. In the process I scratched up some of the ribs. A call to Van's tomorrow to ask about replacement ribs.

Tillamook Fair, then on to Flute and Staighten Main Rib Flanges

Spent some time at the Tillamook County Fair with family. Elly was a star attraction in the magic show!


Flute and straighten all main rib flanges. Deburred first. Then trimmed flanges as per plans on page 15-03. Moved to match-drill the trimmed main rib using the rib doubler as a guide. Then deburred. Continued on with step #6 & 7 before stopping for the night. Tomorrow I’ll rivet the rib doublers in place, etc. It will be a heavy day of riveting.

Adding Nut Plates to Nose Ribs August 1, 2008

Completed steps 5-10. Had to spend time figuring out which dimple die to use. Called Vans and the guy there said to use the #8, but that seemed to be way to big. So, studied plans more, took out the rivet and sized it to the die that seemed to fit the best and then proceeded to dimple. (I think it was the 3/32). Then completed all dimpling and put the nut plates in place as per plans. Next I’ll move on to page 15-03 and begin by flutting the main Rib flanges. Now I’m off to Cape Lookout so that I get there before Ackley. (He is excited about the prospect of going to Hong Kong as a research assistant. It would be good experience for him and open doors down the road.

Fluting and Trimming Nose Rib Flanges


Did steps 2, 3 and 4 on page 15-02. Trimmed flanges as per plans, then used scotchbrite wheel to buff.

Sunday, August 17, 2008

SLANERV12 JULY 30, 2008

Monday, I called Van’s and the guy I talked to said that the hinge assembly flush rivet was within tolerance and not to worry. Yes!

I took Alan Gilmore’s advice (http://www.rv12info.com/) and looked for a knife sharpener to use to debur the scalloped edges of the Nose Ribs. 

I could not find a sharpener with the disks that Alan used, but in my search, I found a knife sharpener that advertised that it also deburred sheet metal and plastic. It is the Accusharp Knife and Tool Sharpener (http://www.acehardwareoutlet.com/(0etn0w55mctut355le2a3345)/productDetails.aspx?SKU=61739).

I used it today on the scalloped edges and the deburring tool that Avery sent for the lightening holes. That went well and I followed up with scotchbrite over all deburred edges.


Now, on to 10-02, step 1: Flute and straighten all of the @1208 Nose Rib flanges. Again, I used the process described by Alan Gilmore (www.rv12info.com/).


Did steps 2, 3 and 4 on page 15-02. Trimmed flanges as per plans, then used scotchbrite wheel to buff.

Completed steps 5-10. Had to spend time figuring out which dimple die to use. Called Vans and the guy there said to use the #8, but that seemed to be way to big. So, studied plans more, took out the rivet and sized it to the die that seemed to fit the best and then proceeded to dimple. (I think it was the 3/32). Then completed all dimpling and put the nut plates in place as per plans. Next I’ll move on to page 15-03 and begin by flutting the main Rib flanges. 

Now I’m off to Cape Lookout so that I get there before Ackley. (He is excited about the prospect of going to Hong Kong as a research assistant. It would be good experience for him and open doors down the road.)
        

SLANERV12 JULY 27, 2008

Riveted the hinge assembly to the rear stub spar assembly, paying particular attention to keep ‘left’ left and ‘right’ right. Glad I did! Daughter Abi and son-in-law Brian came over to deliver their wedding pictures to us and Brian and I worked a bit on the hinge. After repeated squeezing, it was just short of flush. I’ll call Van’s tomorrow and see if there is any wiggle room on this.


Removed all vinyl from nose ribs in preparation for deburring and fluting.

SLANERV12 JULY 26, 2008

I picked up my son, Syd at about 9:15 a.m. and we went back to the condo to work on the plane. Page 14-02 of the plans has us machine counter sink (MCS) the holes on the flanges of the stub spar doubler. Neither Syd nor I have done this so we had to figure it out as we went. We used scrap wood (trimming) to test depth of sink and would insert the rivet to see if it was deep enough (or too deep) before applying to metal. This worked pretty well.


Syd MCS much of one spar doubler and I did the other. Then I deburred all the holes we MCS.


Then, moved on to counter sink the stub spar to accept flush rivets and riveted to the stub spar channels. Plans then indicated to put the faperon hinge assembly together. This went together very well, but when using the rivet squeezer, I could not get the shop side flush. Left it for now and worked on tip attach angle. Separated and deburred. Done for the day.


SLANERV12 JULY 25, 2008


Finished tapping AEX tie downs. This went very well when I tapped in and then backed out, tapped in and backed out to let the cut material fall away. Next time I'll use a little oil to smooth the process.

SLANERV12 JULY 24, 2008


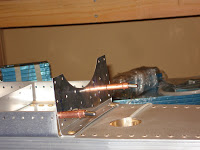
Put together air-hoses. Took rivet tool apart to put oil in, but found that it was full. Also took metal ‘teeth’ off vice and put wood in place so as to be able to grip without damage. Riveted angle flanges to left spar. The bottom photo shows the placement of clecos and the top shows rivets in place. Ran out of air before running out of riveting and running the compressor now will disturb my condo friends. I will go after it again tomorrow.

SLANERV12 JULY 22, 2008


Installed scotchbrite wheel and deburred parts (W-1206V & W-1210B-L & R).Clecoed @1210B-L to W-1206K and match-drilled 1st row of holes, removed and deburred, then set aside.

Next drilled AEX tie downs, but did not have t-handled tap wrench to tap these holes.

Clecoed all @1206V and 1206T attach angles to spar assemblies (steps 1 & 2, p.13-03). Will start riveting tomorrow

SLANERV12 JULY 21, 2008


I called Van’s for update on rivets which were on back-order. They were ready to go, just as Barbara had said they would be. I asked Barbara to ship Scotchbrite wheel in rivet box as well as some scrap material for me to practice on. She said it should have been part of the Wing kit, called “trim package.” I checked when got home from work and there was nothing on inventory list like this. 

Talked with Bruce about how to cut parts. Snips work just fine. Also, no need to debur lightening holes. Also, suggested buying ‘v’ shaped deburring tood in Emery catalog. I continued separating parts. Used snips to separate and file to take away excess material. Last 30 minutes used 60 grit wheel on bench grinder to take down excess material.

I took advantage of a nice day and did some of the filing work on the patio.

SLANERV12 JULY 20, 2008

I could not do an inventory that day, but 2 days later I began laying out parts.


Started with step on page 13-02. Started to separate parts and used the dremmel drill to do this. Broke 3 wheels in the process. Need to find better way.  Ended up using the snips. My concern as a beginner was that I had read the instructions and there was a comment about the snips deforming the sheet metal. After a call to Vans I used the snips from there on out.