Sunday, March 1, 2009

March 1, 2009: Fuel System Install Begun


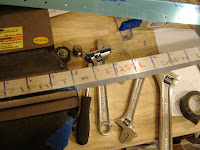
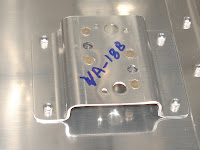
Taking the advise of others, I moved to the fuel system in section 28 before proceeding with the fuselage side skins to have better access. Installing the fluid fittings onto the fuel pump and buiding the handle assembly went well following the directions. Take care to read the "red knob" directions and drill as per the supplied instructions. I almost skipped this part and was devising my own method when I thought to look again. Installing the fuel valve bracket went okay with the help of Wendy who held the bracket in place as I clecoed it from the bottom. Then onto the next infamous page on bending fuel lines. I resisted putting in an advanced tubing replacement order. Following the advice of Joe Gores (http://www.vansairforce.com/community/showthread.php?t=39944), the intial bending went well and that's where I stopped for the day. I posted a question on the forum seeking input from other builders about how to torque in close quarters and how much flare do you flare.

February 28, 2009: LONGERONS Continued!


Page 22-02 continues! Deburred canopy decks. Then used a piece of scrap .025 thick aluminum to simulate the side skin and clamped the deck to the longergons. Matched drilled through the deck into the longerons. To keep the drill perpendicular, I monitored the reflection of the drill bit which should appear straight, if it is perpendicular. Dan Benua gave me this tip and it works well. I then took things apart, primed the longerons and left them to dry.

Now here's the question. Step 4 tells you to produce a curve that matches the canopy deck template "within a sixteenth of an inch. I did this, but when using the scrap aluminum to simulate the side skin, I see that the deck overhangs the skin by the 1/16 inch mentioned earlier. I hope this is within tolerance. I'm going to call Van's tomorrow to ask. My plan is to take a vixon file and shave off the excess overhang.

February 22, 2009: LONGERONS!!! *#$&%#@!!!


The longerons are nothing if not frustrating. I think I'm growing neurons though and that's a good thing! I started by marking the "end of the twist", start of the curve, etc. as well as the curve section with 1 inch incremental marks. This helped immensely! I used the Marty Santic method to open the angle 5.4 degrees. That is to say, take a scrap piece of angle, place it over the longeron portion to be opened and hit it hard with a hammer. This worked well. Then twist the end of the longeron 2.7 degrees. I used a level of sorts that shows degrees. I twisted until it displayed approximately the 2.7 and moved onto curving the longerons. The 1st was the Left longeron and I overbent it. From there is was pure frustration. I finally got it to where it was passable, then began the right longeron. I know I grew dendrites on this job because the 2nd longeron went much faster and easier than the first. My advice is to use a vise, put the longeron under a "pre-load" and whack it at the point where it enters the vise. Don't over-do this part. If you didn't whack it hard enough, you can always revisit this, inch by bloody inch. After 9 hours, I quit for the day.

February 16, 2009: Longerons Begun!


I spent one hour going back to any nut or bolt for which I either knew I didn't torque or wasn't sure and torqued as per recommended pound inches. Then, one of the EAA Chapter Technical Counselors, Dan Benua, came by to check on a couple of rivets I was uneasy about. He said they were fine, but let's drill one out so that I knew how to do this re-rivet using a gun and bucking bar. This went pretty well due to his expertise and the tools he brought (12" #40 drill, bucking bar, offset gun, etc.). After Dan left, I started on page 23-02, the well-known "LONGERON". Many have entered and not as many have emerged. I took the better part of an hour measuring and cutting the bar to length, and getting everything I will need to complete this part of the building process.

February 15, 2009: Page 23-04, Step 4


Following tip by Jetguy (Van's forum post on 1/30/09) I went ahead to 23-04, step 3, and riveted the F-1202E (R & L) before attaching the fwd lower fuse assembly to the mid-fuse. I'm glad I did because it is tight quarters to do in after the fuse assembly is in place. Then fitted and riveted the fwd fuse assembly into place.

February 14, 2009: Flo-scan bracket


Page 22-05 completed various tasks (install nutplates, final-drilling, and attach the Flo-scan mount bracket.

February 11, 2009: Completed Page 22-03


Completed page 22-03. Made a quick run to VANs to pick up some proseal. Talked with technician and he sold me the firewall sealant to use instead. I applied it to the same spots as indicated in the plans prior to the revision. Hope this is okay! Seemed like quite the waste in that you can see the size of the $17 tube, and the job only required about 20% of it, tops.

February 10, 2009: Page 22-03 Cont.


Fabricated the F-1201L bracket (3 times!) on Page 22-03. The 1st two were less than acceptable because I had difficulty match drilling the holes through the firewall and keeping the bracket snug against the tunnel rib. Must keep in mind that not only is the task to build a plane, but to learn a great deal about it along the way.