Saturday, September 27, 2008

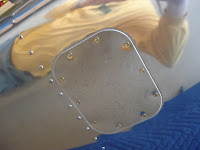
September 27, 2008: Right bottom wing skins in place!


Dan Benua (EAA Tech Advisor) will come tomorrow to see the RV12 and give me his input. Today I riveted the 1201R panel to the ribs and continued with the W1203 skin. I did better with the tiedown hole on the right wing compared to the left. With the right wing, I used the unibit and created a very nice, round hole of exact 3/8 dimension.

Then clecoed and riveted into place. Some holes were a bit stubborn in didn't line up well. I used an awl and most holes came into line. For 2-3 holes, I used the #30 drill and then rivets went in easily. It seems like I've used about 1/2 of the 10,000 rivets so far!

Friday, September 26, 2008

September 26, 2008 Right Wing Skins


Today, I de-plasticized the W-1201R and W-1203R, then deburred both. Paying close attention to the directions to dimple in 2 places (which includes a total of 3 holes) and then cleco the 1201R to the wing ribs in a few places. Tomorrow I am expecting a visit from Dan Benua, an EAA Technical Advisor out of Chapter 105 in Hillsboro, OR.

I will finish the wings about the time I suspect the fuselage kit will arrive. I have not been notified yet of a shipping date, but Steve Wyman (kit #38) is expecting his wing kit October 14th. I'm kit #43, so I expect to get an October delivery date.

Tuesday, September 9, 2008

September 9, 2008 Rivet Nose Ribs to Right Spar


This evening I riveted the nose ribs to the right wing spar and then the left stub spar assembly. Since I'm a good and sensitive guy, I did not start the compressor because I am working in a one-car garage in my small condo with neighbors on both sides. A bit cramped to be sure. So, I used the hand riverter which worked great! Then I inserted the snap bushings and ran the string through the ribs from outbard to in-board.

September 7, 2008 Attaching Main Ribs to Right Spar


Having finished up the left wing to page 17-06, I went back to page 15-04 to begin (again) the right wing. Having completed the right wing ribs, right rear spar assembly, etc. when I did the left wing gave me a jump start on the right wing. Brian (son-in-law) came over and we spent about 4 hours completing and riveting the main ribs to the spar , then attached the right rear spar assembly. This process went smoother on the right than it did for the left, mainly due to experience and lessons learned. We did a better job of protecting the spar from scratching and used the close-in hand riveter supplied by Avery's when it got a bit tight. Next I'll move onto the nose ribs.

Monday, September 1, 2008

August 31, 2008 Wing Tip Close-Out


Made the bending tool. Pretty easy! Then used a school supply protractor ($1.49) to measure degrees. This was a bit by guess and by golly, but ultimately was very close to the needed angles. So much so that the skin fit into place very easily.

Tim had come over in the morning to help me flip the wing upside down so that I could install the wing tip close-out skin. After clecoeing in place I riveted things together and finished up. The question that I had for the day was the final step to ensure that the wing tip trailing edge was parallel to the trailing edge of the wing. It was, but I don't know what I would have done had it not been. The directions indicate to adjust, then rivet, but I don't see what there is to adjust.

August 30, 2008 Access hatch, hand hold and wing skin


After sleeping on it, I figured out why the wing walk doubler went on easier than expected. I was supposed to slightly bend the forward edge so that it would be more flush when riveted in place. Danged! After contemplation and re-reading the directions (they say "it may be necessary") I decided to leave it, at least of the time being. If I change my mind later (and drill out more than 100 rivets) I can still access the doubler.

I moved on to the access hatch. The wing was right side up and I had no one to help me flip the wing, so I worked on the floor to install the access hatch. This method took longer than it would have, but it was a productive use of my time and turned out well.

Moving on, I created the hand hold, cleocoed it in place and installed the tip rib and bottom skin. Everything went well and I then installed the skins and wiing tip ribs. It was a bit tricky to get the flutting right so that the fwd wing tip rib matched the skin, but with some trial and error it worked well.

Tomorrow I will bend the tabs for the wing tip close-out (p. 17-06).