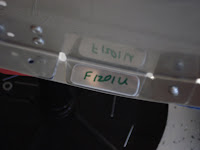


Page 22-02, step 10 was very easy and fairly quick. The hardest part about making the F-1201U spacers was finding the material! The directions note that you "curve parts slightly by hand in the following steps for a better fit." I did this, but didn't find it necessary to make much of a curve.
Step 11, was good and move fwd smoothly. Placing the spacer in the right place and carefully putting the F-12118 Cowl Attach Plates over it relies on this friction fit to hold it in place.
Step 12 depends on the friction fit while you match-drill #30 holes through the spacers and cowl attach plates, although one spacer was a wee bit out from where I wanted it. (I'm probably the only one that will ever notice this). In the photo you will notice that I wrote MCS on the cowl attach plate. I did this to ensure that I MCS on the proper side of the plate.
I was not moving at the speed of light and this all took me about 3 hours (bother terrapin).

No comments:
Post a Comment