Saturday, October 18, 2008
Saturday, October 18, 2008: Wing tip close-out
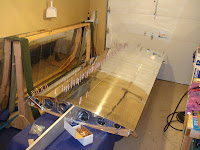
Tim and Tiffany came over and after I made them breakfast, Tim and I worked on the final stage of right wing tip. Everything went together well and the trailing edge of the wing tip was parallel to the wing. The only problem was that I read and re-read the plans so many times that I didn't pay close attention the final time and used the #3 rivet instead of the #4 as called out. I may go back and drill out the 6 rivets this covers and replace. I think it would make for a tighter fit.
Friday, October 17, 2008
Friday, October 17, 2008: Completed Wing tip close-out
Deburred Wing tip close-out skin and then bent tabs following the directions (17-06). I used a protractor and it worked pretty well. I cleoed the close-out onto the wing, and needed to take if off once to readjust a couple of the tabs, although minor. When finished and cleoed into place, it was a good fit and went on to rivet in place. The deburred and cleoed the wing tip trailing edge into place. What I don't quite figure is why check for parallel when the cleoed holes pretty much dictate placement with little if any latitude in movement. Oh well, will follow directions precisely and finish it up. Son Tim is coming for breakfast, with his girl friend Tiffany and after breakfast I'll get him to help me flip the wing and check for parallel. Then we'll finish the wing and put it into the cradle.
Thursday, October 16, 2008
Tonight, I worked on the handhold, riveting into place along with rib and wing skin. I did need to trim the rear spar assembly to accept the flanges (17-05). I think the trim job I did was find, but upon closer examination, one would not have to trim too much to make things fit. Wing tip ribs in place clecoed then riveted. Tomorrow I'll tackle the wing tip close out.
Van's notified me that the fuselage kit would be ready for me to pick up the week of November 4.
Wednesday, October 15, 2008: Wing walk doubler installed
The debacle wasn't so bad after all. I visited Vans and bought a new doubler, but before I pulled the plastic off, decided to try one more technique to bend the edge, which was wavy by this time. Using the hand seamer, I bent the edge and darned if it didn't work! It took the waves out and made the bend. So proceeded to clecoe in place and rivet. I did not have to strap the doubler down like Jim Cone did, but I suspect he has a much snugger fit along the edge.
So, I'll return the extra doubler to Van's when I pick up the fuselage kit which I was told would be ready the week of November 4. WooHoo!
After the doubler installation, I moved on to the wing tip hand hold, rib and wing skin. Everything clecoed into place, but not riveted. I'm in a one-car condo remember and I can't make too much noice or my very understanding neighbors could become grouchy. I'm lucky to have such good neighbors so I like to be careful not to take advantage.
Friday, October 10, 2008
October 10, 2008 Right Wing Skins Install, Wing Walk Doubler Debacle
Attached top wing skins and riveted in place. Began work on wing walk doubler. I tried using the edge rolling tool but the result was wavy without the intended bend. Frustrating to say the least. I'll leave it for today and see if I can remove the waves tomorrow and get a bend with the tool. If not, I'll have to purchase another wing doubler skin and try again.
Wednesday, October 8, 2008
October 7, 2008: Right Wing Top Skin
Subscribe to:
Posts (Atom)